
How to Set Up a MetaMask Wallet Correctly
What Is MetaMask? (And Why You Need It)
MetaMask is a cryptocurrency wallet that exists as a browser extension (Chrome, Firefox, Brave, Edge) or mobile app (iOS, Android).
Why MetaMask Exists:
When you want to use decentralized applications (dApps) like:
- Uniswap (decentralized exchange)
- Aave (lending/borrowing)
- OpenSea (NFT marketplace)
- Any DeFi protocol
You need a wallet to connect to these sites. MetaMask is that bridge.
MetaMask vs. Exchange Wallets:
| Factor | Exchange Wallet (Coinbase) | MetaMask |
|---|---|---|
| Control | Exchange controls your keys | You control your keys |
| Security | Exchange is target for hackers | Your device security is critical |
| DeFi Access | Can’t connect to dApps | Full DeFi access |
| Recovery | Customer support can help | You’re on your own |
| Fees | Exchange sets fees | You control gas fees |
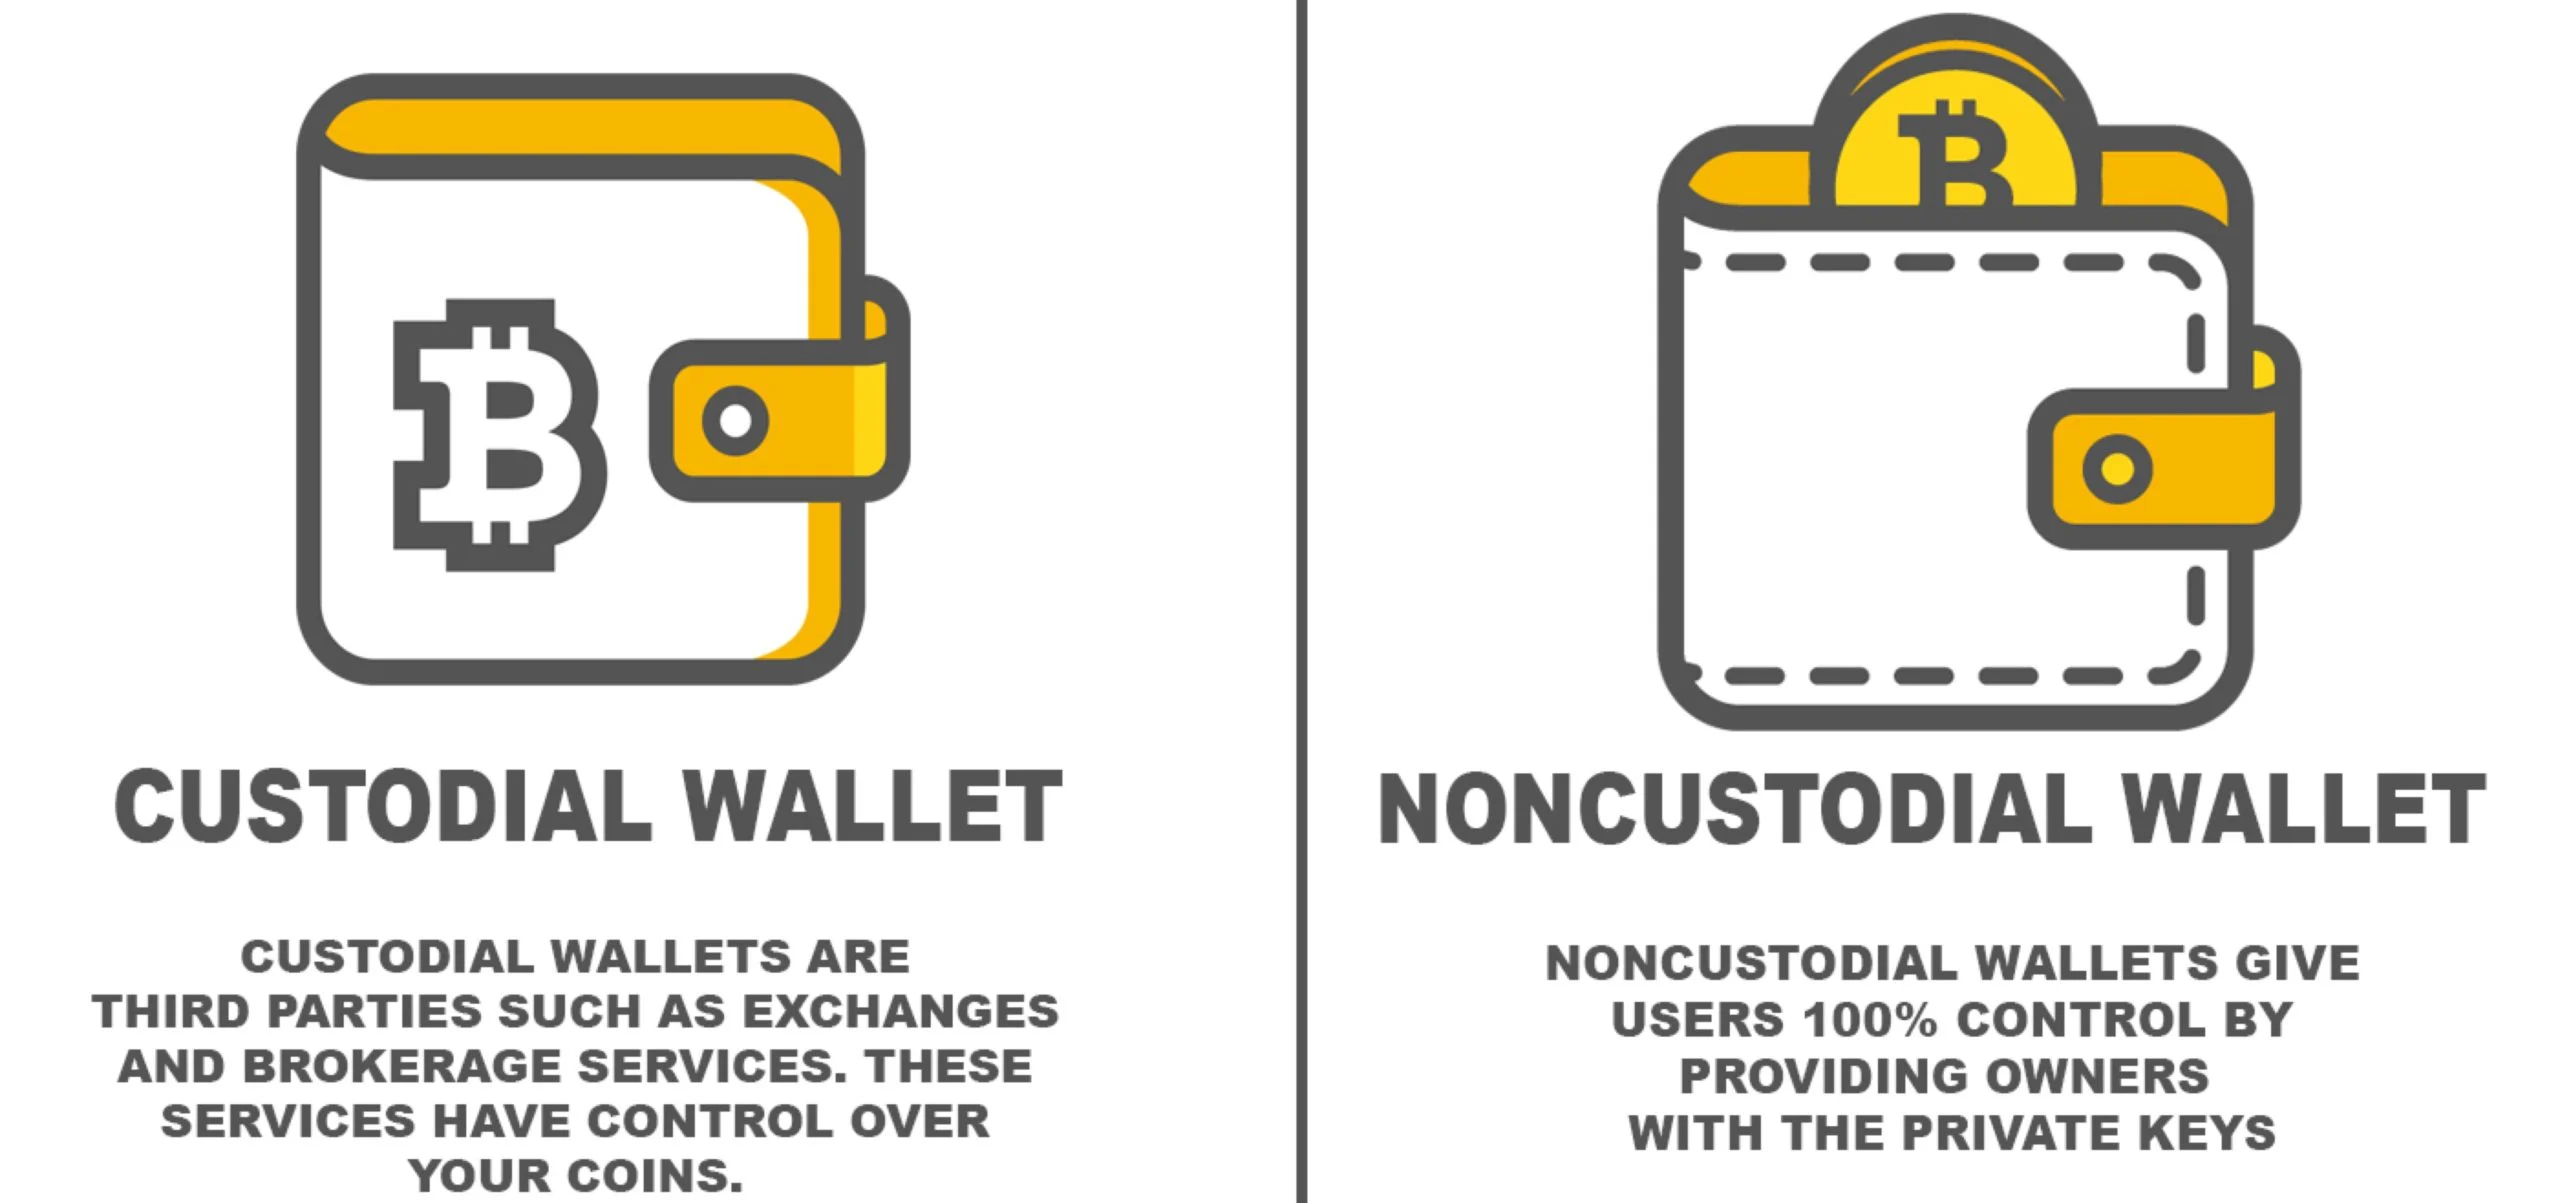
| Custody | Custodial (they hold) | Non-custodial (you hold) |
Simple rule:
- For buying/holding crypto: Use reputable exchanges (easier, safer for beginners)
- For using DeFi: You need MetaMask (or similar self-custody wallet)
Critical Distinction:
MetaMask = YOU are the bank. If you lose your seed phrase, your crypto is gone forever. No customer support can recover it. No “forgot password” option. It’s permanent.
Before You Install: Critical Pre-Setup Steps
Most people rush to install MetaMask. This is a mistake.
Pre-Setup Checklist:
Step 1: Secure Your Computer/Phone
Computer:
- Operating system fully updated
- Antivirus installed and active
- No pirated software (keyloggers hide in cracks)
- Strong device password (not your name/birthday)
- Ideally: Use a dedicated browser ONLY for crypto
Phone:
- iOS 15+ or Android 12+ (older = security vulnerabilities)
- Biometric lock enabled (Face ID / Fingerprint)
- No jailbreak/root (removes security protections)
- Apps only from official stores
Why this matters: If your device has malware, it can steal your seed phrase the moment you create it. No amount of MetaMask security will save you.
Step 2: Prepare Offline Seed Phrase Storage
Before you create the wallet, decide where you’ll store the seed phrase.
You need:
- Paper (preferably waterproof/fireproof paper)
- OR metal seed phrase backup (Cryptosteel, Billfodl)
- A fireproof safe or safety deposit box
- Plan for where second backup will go
NEVER store seed phrase:
- In screenshots on your phone
- In Google Photos / iCloud
- In email (even drafts)
- In password manager (debated, but risky)
- On your computer in text file
- In the cloud (Dropbox, Google Drive, etc.)
Your seed phrase must be OFFLINE. Period.
Step 3: Clear Your Physical Space
Before creating your wallet:
- Close blinds/curtains (no cameras can see your screen)
- Turn off any webcams
- Make sure you’re alone
- No one looking over your shoulder
I know this sounds paranoid. But your seed phrase is literally money. Would you count $50,000 in cash with strangers watching? No.
Step 4: Verify Official Website/App
The ONLY official sources:
- Website: https://metamask.io (check spelling character by character)
- Chrome Store: Search “MetaMask” → verify publisher is “metamask.io”
- iOS App Store: Search “MetaMask” → developer “MetaMask”
- Google Play: Search “MetaMask” → developer “ConsenSys”
DANGER: Fake MetaMask Apps
Scammers create fake versions of MetaMask with similar names:
- “MetaMask Wallet” (note the extra “Wallet”)
- “MetaMask – DeFi Wallet”
- “MetaMask Crypto Wallet”
These are SCAMS. They steal your seed phrase immediately.
How to verify: Check the number of users. Real MetaMask has 30+ million users. Fakes have hundreds or thousands.
Installation: Step-by-Step – Browser Version
I’ll walk through the browser extension setup. Mobile setup is similar but I’ll cover differences at the end.
Step 1: Download From Official Source
- Go to https://metamask.io (type manually, don’t click links)
- Click “Download” button
- Select your browser (Chrome/Firefox/Brave/Edge)
- Click “Install MetaMask for [Browser]”
- Your browser’s extension store opens
- Verify URL is your browser’s official store
- Check publisher is “metamask.io”
- Check user count (30M+)
- Click “Add to [Browser]”
Pro Tip: Use Brave browser for crypto. It has built-in ad blocking (prevents malicious crypto ads) and enhanced privacy protections.
Step 2: Pin the Extension
- After installation, MetaMask icon appears in browser toolbar
- Click the puzzle piece icon (extensions)
- Find MetaMask → click the pin icon
- Now MetaMask icon is always visible
Why: You want quick access without searching. Also makes it obvious if a site is trying to mimic MetaMask.
Step 3: Start Setup
- Click MetaMask fox icon
- Welcome screen appears
- Two options:
- “Create a new wallet” (we’ll use this)
- “Import an existing wallet” (if you already have one)
- Click “Create a new wallet”
Step 4: Data Collection Agreement
- MetaMask asks permission to collect usage data
- This is optional – choose what you’re comfortable with
- I personally click “No thanks” for maximum privacy
- Click your choice
Step 5: Create Your Password
This password is ONLY for unlocking MetaMask on this specific device. It’s NOT your seed phrase.
Password Requirements:
| Requirement | Why It Matters |
|---|---|
| Minimum 8 characters | MetaMask requires this |
| Use 12+ characters | Actual security requires longer |
| Mix upper/lower/numbers/symbols | Harder to guess/brute force |
| Unique password | Not used anywhere else |
| Not personal info | No name, birthday, pet names |
Good password example: mT9$kLp2@vNx5wQ!
Bad password example: password123, John1985, crypto2024
How to Create Strong Password:
Method 1: Use a password generator
- Bitwarden (free)
- 1Password
- LastPass
Method 2: Random word method
- Pick 4 random words:
correct-horse-battery-staple - Add numbers/symbols:
Correct-H0rse-B@ttery-St@ple99
- Enter your password
- Re-enter to confirm
- Check “I understand” box
- Click “Create a new wallet”
Step 6: Security Video (Watch This)
- MetaMask shows a short video about seed phrases
- WATCH THIS VIDEO – don’t skip
- Key points:
- Seed phrase = full access to wallet
- Never share with anyone (even “MetaMask support”)
- MetaMask will never ask for your seed phrase
- Click “Next” after video
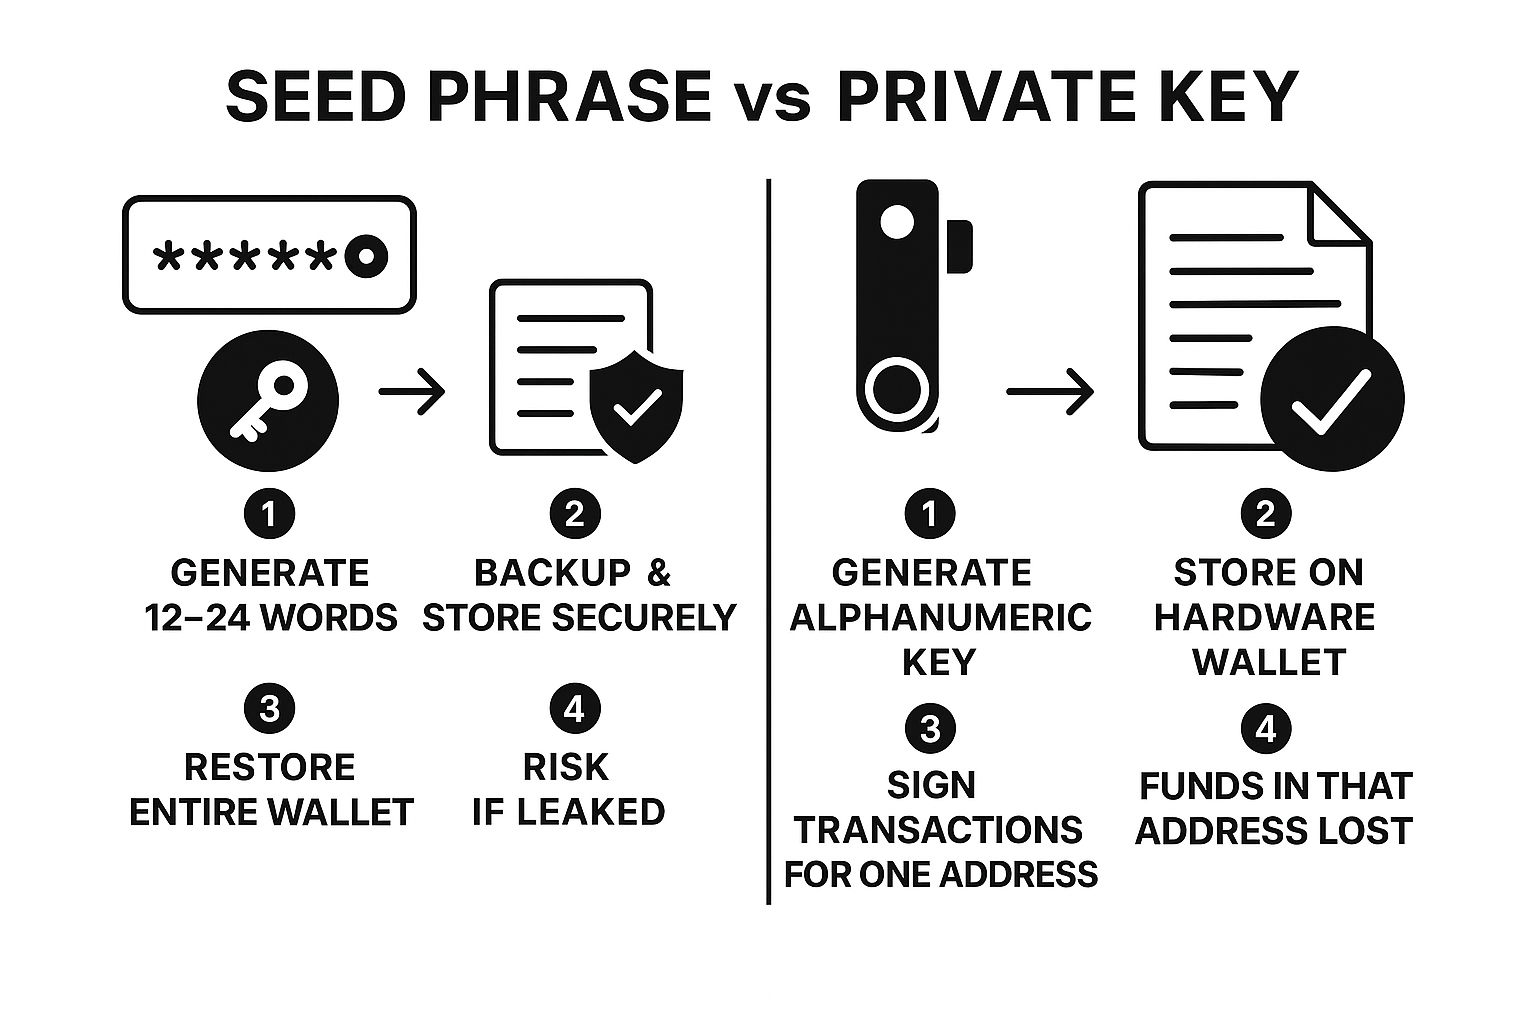
Step 7: Reveal Your Seed Phrase (CRITICAL STEP)
This is the most important part of the entire setup.
Before You Click “Reveal”:
- Close ALL other browser tabs (no malicious sites can screenshot)
- Disable screen recording software (Loom, OBS, etc.)
- Cover your webcam (tape or built-in cover)
- Check no one is behind you
- Have your paper/metal backup ready
- Put phone in airplane mode (if using phone for photos – but DON’T)
Writing Down Your Seed Phrase:
- Click “Reveal Secret Recovery Phrase”
- 12 words appear
- Write them down EXACTLY as shown
- Include the number before each word (1. word1, 2. word2, etc.)
- Double-check spelling of each word
- Triple-check the order
Example Seed Phrase Format:
- abandon
- ability
- able
- about
- above
- absent
- absorb
- abstract
- absurd
- abuse
- access
- accident
(This is a random example, not a real seed phrase)
Common Writing Mistakes:
| Mistake | How to Avoid |
|---|---|
| Mixing up similar words | “quite” vs “quiet” – write clearly |
| Wrong order | Write numbers before each word |
| Unclear handwriting | Print in block letters, test readability |
| Lost paper | Make TWO copies immediately |
After Writing:
- Read it back to yourself
- Compare to screen word-by-word
- Check spelling
- Verify order
- Make second backup copy NOW
DO NOT:
- Take a screenshot (can be hacked/leaked)
- Type it into your computer (keyloggers)
- Email it to yourself
- Save it in notes app
- Tell anyone the words
- Take a photo (even if you delete it – it’s in cloud backup)
Step 8: Confirm Your Seed Phrase
- Click “Next”
- MetaMask asks you to confirm the seed phrase
- Click the words in the correct order
- This verifies you wrote it down correctly
- If wrong, go back and rewrite
- Click “Confirm”
Step 9: Wallet Creation Complete
- Success screen appears: “Wallet created successfully!”
- Click “Got it!” or “Done”
- You now see your MetaMask wallet interface
What You See:
- Account name: “Account 1” (you can rename this)
- Your wallet address: 0x1234…abcd (42 characters, starts with 0x)
- Balance: 0 ETH (you haven’t deposited yet)
- Three tabs: Assets / Activity / History
Immediate Security Actions (Do This Now)
Your wallet is created. Before you do ANYTHING else, secure it properly.
Action 1: Store Your Seed Phrase
Primary Backup:
- Place written seed phrase in fireproof safe at home
- OR place in bank safety deposit box
- Tell ONE trusted person where it is (for inheritance)
Secondary Backup:
- Place second copy in different physical location
- Parents’ house, trusted friend, office safe
- NOT in the same building as primary backup (fire/disaster)
See my guide on crypto inheritance planning for long-term storage strategies
Action 2: Test Your Seed Phrase
Before you send any money to this wallet, TEST the recovery process.
How to Test:
- Write down your current wallet address (0x123…abc)
- Click Settings (three dots) → Lock
- Click “Forgot password?”
- Enter your 12-word seed phrase
- Set new password
- Unlock wallet
- Verify address matches what you wrote down
If the address matches: Your seed phrase backup is correct
If it doesn’t match: You wrote it down wrong – FIX THIS NOW before depositing funds
Action 3: Bookmark the Real MetaMask
- Go to https://metamask.io
- Bookmark it (Ctrl+D or Cmd+D)
- Name it clearly: “MetaMask Official”
- Folder: Create “Crypto – Verified Sites” bookmark folder
Why: Phishing sites often rank high in Google. Never use search to find MetaMask. Use your bookmark.
Action 4: Enable Additional Security
Auto-Lock Timer:
- Click Settings (three dots)
- Settings → General
- Find “Auto-Lock Timer”
- Set to 1 minute (or 5 minutes max)
Why: If you walk away from computer, MetaMask locks automatically. Prevents someone accessing your wallet if you leave screen unlocked.
Hide Balance (Optional):
- Settings → General
- Enable “Hide Zero Balance Tokens”
- Reduces clutter, focuses on what you own
Action 5: Save Your Wallet Address
- Click your account name at top
- Click the copy icon next to your address (0x123…)
- Paste into a document: “MetaMask Address: 0x123…”
- Save this document securely
Why: You’ll need this address to receive funds. It’s NOT sensitive (public info), but convenient to have saved.
Mobile Setup (iOS/Android Differences)
Mobile setup is similar to browser, with some key differences:
Installation Steps:
iOS (iPhone/iPad):
- Open App Store
- Search “MetaMask”
- Verify developer: “MetaMask”
- Check rating: 4.5+ stars, millions of downloads
- Install
- Open app
- Follow same seed phrase steps as browser
Android:
- Open Google Play Store
- Search “MetaMask”
- Verify developer: “ConsenSys”
- Check downloads: 10M+
- Install
- Follow same seed phrase steps
Mobile-Specific Security:
Enable Biometric Lock:
- Settings → Security & Privacy
- Enable “Login with Face ID” (iOS) or “Login with Fingerprint” (Android)
- This adds layer on top of password
Cloud Backup WARNING:
DO NOT enable:
- iCloud backup for MetaMask
- Google Drive backup
- Any automatic cloud backup
How to disable:
- iOS: Settings → [Your Name] → iCloud → Manage Storage → MetaMask → Delete Data
- Android: Settings → Google → Backup → App Data → MetaMask → Turn Off
Why: If your cloud account is compromised, attacker gets your encrypted wallet. With keyloggers or other methods, they might crack it.
Mobile vs Browser: Which to Use?
| Factor | Browser Extension | Mobile App |
|---|---|---|
| Security | More vulnerable to browser extensions | More vulnerable if phone lost/stolen |
| Convenience | Better for desktop DeFi trading | Better for on-the-go access |
| dApp Compatibility | Works with all desktop dApps | Some dApps mobile-only |
| Screen Size | Easier to review transactions | Small screen = easy to miss details |
My recommendation: Use BOTH, but for different purposes:
- Browser: Main wallet for serious DeFi trading
- Mobile: Separate wallet with small amounts for mobile dApps
Don’t use the same seed phrase for both. Keep them separate for security.
Using MetaMask Safely (Critical Operating Procedures)
You have a secure wallet. Now don’t screw it up by using it carelessly.
Rule 1: Always Verify the URL
Before connecting MetaMask to ANY site:
- Look at the URL bar
- Read every character of the domain
- Check for: https:// (secure connection)
- Watch for Unicode lookalikes (ūniswap vs uniswap)
- Verify it’s the EXACT domain you intended
Real vs Fake URL Examples:
| Real Site | Fake Site (Scam) |
|---|---|
| uniswap.org | unīswap.org (macron over i) |
| app.aave.com | app-aave.com |
| opensea.io | opensea.com |
| curve.fi | curve-fi.com |
Pro tip: Bookmark all DeFi sites you use. Never click links from Discord, Telegram, Twitter, or email.
Rule 2: Read Every Transaction Before Signing
When MetaMask pops up asking you to sign a transaction, DON’T auto-click “Confirm.”
What to Check:
- Contract address: Does it match the protocol you’re using?
- Function name: Does it make sense? (“swap” is good, “transferOwnership” is sus)
- Amount: Is it what you intended to trade/send?
- Gas fee: Is it reasonable? ($5-50 normal, $200+ is high)
- Approval amount: Is it requesting “Unlimited”? (see next section)
If ANYTHING looks wrong:
- Click “Reject”
- Close the site
- Clear your browser cache
- Start over from bookmarked URL
Rule 3: Limit Token Approvals
When using DeFi, you must “approve” the protocol to spend your tokens.
The Problem:
Most protocols request “Unlimited” approval by default. This means they can spend ALL of that token from your wallet forever.
If the protocol gets hacked, or if it’s a scam, your entire balance is at risk.
The Solution:
- When approval popup appears, click “Edit”
- Change from “Unlimited” to specific amount
- Example: If swapping 100 USDC, approve only 100 USDC (not unlimited)
- You’ll need to approve again next time, but it’s safer
Pro Tip: Use Revoke.cash to see all your active approvals and revoke old ones.
- Go to revoke.cash
- Connect MetaMask
- See list of all contracts that can spend your tokens
- Revoke any you don’t actively use
See my scam prevention guide for more on approval exploits
Rule 4: Never Share Your Seed Phrase
NOBODY legitimate will EVER ask for your seed phrase:
Common phishing attempts:
“Your wallet has been flagged for suspicious activity. Click here and enter your seed phrase to verify.”
➜ SCAM
“MetaMask is upgrading. You must re-enter your recovery phrase.”
➜ SCAM
“Support ticket #12345 – We need your seed phrase to help recover your funds.”
➜ SCAM
If someone asks for your seed phrase, it’s a scam. No exceptions.
Rule 5: Start Small
Your first time using MetaMask for DeFi:
- Send only $50-100 to test
- Try a simple swap on Uniswap
- Send funds back to exchange
- Confirm everything works
- THEN send larger amounts
Why: If you mess up (wrong address, too low gas, etc.), you lose $50 instead of $5,000.
I’ve seen people send $20K to MetaMask as their first transaction, then immediately get phished. Learn with small amounts.
How to Fund Your MetaMask Wallet
Your wallet is set up. Now you need to add funds.
Method 1: Buy Crypto on Exchange, Send to MetaMask (Recommended)
Step-by-step:
- Buy ETH on Coinbase, Kraken, or Binance
- Copy your MetaMask address (click to copy: 0x123…)
- In exchange, click “Withdraw” or “Send”
- Select “Ethereum” (not Binance Smart Chain or other networks)
- Paste your MetaMask address
- Choose network: Ethereum Mainnet
- Enter amount to send
- Double-check address (first 6 characters + last 4)
- Confirm withdrawal
- Wait 5-15 minutes for funds to appear
CRITICAL: Verify the Network
MetaMask supports multiple networks (Ethereum, Polygon, BSC, etc.). Make sure:
- Exchange is sending on Ethereum Mainnet
- MetaMask is set to Ethereum Mainnet
If you send ETH on BSC network to an Ethereum address, it’s lost forever.
Method 2: Buy Directly in MetaMask (Convenient but Expensive)
- Click “Buy” in MetaMask
- Choose provider (MoonPay, Transak, Wyre)
- Enter amount
- Provide payment info
- Complete KYC if required
- Confirm purchase
Pros: Fast, no need for exchange account
Cons: Fees are 3-7% (vs 0.5% on exchanges)
My take: Only use this for small amounts ($100-200). For anything larger, use an exchange and transfer.
Method 3: Receive from Another Wallet
- Copy your MetaMask address
- Send to the person sending you crypto
- They send to your address
- Wait for confirmation
Important: Always test with small amount first if it’s a new contact.
Adding Custom Tokens and Networks
Adding Tokens (ERC-20)
MetaMask doesn’t show every token by default. You need to add them manually.
Method 1: Automatic (CoinGecko/CoinMarketCap)
- Go to CoinGecko.com
- Search for your token (e.g., “Chainlink”)
- Click the MetaMask fox icon
- Confirm “Add Token” in MetaMask
- Token now appears in your wallet
Method 2: Manual (Contract Address)
- Find token contract address (from official website/Etherscan)
- In MetaMask, scroll to bottom → “Import tokens”
- Paste contract address
- Token symbol and decimals auto-fill
- Click “Add Custom Token”
- Confirm
SCAM WARNING: Fake Tokens
Scammers create fake tokens with names like:
- “Uniswap Reward” (fake UNI)
- “USDC.e” (fake USDC)
- “Ethereum 2.0” (doesn’t exist as separate token)
How to avoid:
- Only add tokens from official project websites
- Verify contract address on Etherscan
- Check token has verified contract
- Never add tokens from random airdrops
Adding Networks (L2s, Sidechains)
MetaMask defaults to Ethereum Mainnet. To use other networks:
Popular Networks to Add:
| Network | Why Use It | Gas Fees |
|---|---|---|
| Polygon | Cheap DeFi, NFTs | $0.01-0.10 |
| Arbitrum | Ethereum L2, low fees | $0.10-1.00 |
| Optimism | Ethereum L2 | $0.10-1.00 |
| Base | Coinbase L2 | $0.01-0.50 |
| BNB Chain | Binance ecosystem | $0.10-0.50 |
How to Add Network:
Automatic (from dApp):
- Visit site that uses the network (e.g., Polygon dApp)
- MetaMask prompts: “Allow this site to add a network?”
- Review network details
- Click “Approve”
- Network added
Manual:
- Click network dropdown (shows “Ethereum Mainnet”)
- Click “Add Network”
- Enter network details:
- Network Name: Polygon
- RPC URL: https://polygon-rpc.com
- Chain ID: 137
- Currency Symbol: MATIC
- Block Explorer: https://polygonscan.com
- Save
Easy method: Use Chainlist.org
- Go to chainlist.org
- Connect MetaMask
- Search for network (e.g., “Polygon”)
- Click “Add to MetaMask”
- Approve in popup
Common MetaMask Problems and Solutions
Problem 1: Transaction Stuck/Pending
Cause: Gas price set too low during network congestion
Solution:
- Click pending transaction
- Click “Speed Up”
- Increase gas price
- Confirm new transaction
- Old transaction gets replaced
Alternative: Cancel transaction
- Click pending transaction
- Click “Cancel”
- Pay gas fee to cancel
- Try transaction again with higher gas
Problem 2: “Insufficient Funds for Gas”
Cause: You have tokens but no ETH to pay gas fees
Solution:
- Need to buy ETH to pay gas
- Send ETH from exchange to MetaMask
- Even $20-50 ETH is enough for several transactions
Remember: Every transaction on Ethereum costs ETH for gas, even if you’re trading other tokens.
Problem 3: “Wrong Network” or Can’t See Tokens
Cause: MetaMask is on different network than your tokens
Solution:
- Check which network you’re on (top of MetaMask)
- Switch to correct network
- Example: If tokens are on Polygon, switch from “Ethereum Mainnet” to “Polygon”
- Tokens should now appear
Problem 4: Sent to Wrong Address
Reality: If you sent to wrong address, funds are likely gone forever
Possible solutions (rarely work):
- If you sent to exchange address you control → contact exchange support
- If you sent to wrong network (e.g., BSC instead of Ethereum) → some recovery services can help (expensive)
- If you sent to typo’d address → it’s gone
Prevention:
- Always send small test amount first
- Double-check address character-by-character
- Use ENS names (.eth) when possible (harder to typo)
Problem 5: “MetaMask Has Been Hacked”
If your wallet is drained:
- STOP – don’t send more funds to that wallet
- Create new MetaMask wallet (new seed phrase)
- If you have any funds left, move them immediately to new wallet
- Revoke all token approvals on old wallet (revoke.cash)
- Scan computer for malware
- Change all passwords
- Never use compromised seed phrase again
Report:
- Report to the DeFi protocol that was exploited
- Report to relevant exchange if applicable
- File FBI IC3 report (won’t recover funds, but creates record)
Accept: Stolen crypto is almost never recovered. Consider it a lesson and move forward with better security.
Advanced Tips for Power Users
Tip 1: Multiple Accounts in One Wallet
You can create multiple accounts under one seed phrase:
- Click account circle (top right)
- Click “+ Create Account”
- Name it (e.g., “DeFi Trading”, “NFTs”, “HODL”)
- New address generated
Use cases:
- Separate DeFi trading from long-term holdings
- Separate NFTs from tokens
- Privacy (different accounts for different activities)
Important: All accounts share the same seed phrase. If seed phrase is compromised, ALL accounts are compromised.
Tip 2: Hardware Wallet Integration
For large amounts, connect MetaMask to hardware wallet:
- Buy Ledger or Trezor
- Set up hardware wallet
- In MetaMask: Settings → Advanced → Connect Hardware Wallet
- Select Ledger or Trezor
- Follow connection steps
- Choose which hardware wallet accounts to import
Benefit: MetaMask interface, hardware wallet security. Private keys never touch your computer.
Tip 3: Custom Gas Settings
During high congestion, fine-tune gas:
- Start transaction
- MetaMask shows gas options: Low / Market / Aggressive
- Click “Advanced”
- Manually set:
- Max base fee
- Priority fee
- Confirm
Use sites like:
- etherscan.io/gastracker
- ultrasound.money
To see current gas prices and time estimates.
Learn more about gas fees and how to minimize them
Tip 4: Portfolio Tracking
MetaMask shows basic balances, but for full tracking:
- Zapper.fi – Connect wallet, see all positions across DeFi
- DeBank – Similar to Zapper
- Zerion – Portfolio tracker + wallet interface
These sites show:
- All your tokens
- NFTs
- DeFi positions (staked, lending, LP)
- Historical performance
FAQ: Your MetaMask Questions Answered
Q: Can I use the same MetaMask on multiple devices?
A: Yes, use your seed phrase to restore wallet on any device. But this increases risk – more devices = more attack surfaces.
Better approach: Use different wallets for different devices (separate seed phrases).
Q: What if I forget my MetaMask password?
A: You can reset it using your seed phrase. The password only locks THIS device. The seed phrase is the master key.
Q: How much does MetaMask cost?
A: MetaMask itself is free. You only pay:
- Gas fees (for transactions)
- Swap fees (if using MetaMask Swap feature, typically 0.875%)
Q: Is MetaMask safe?
A: MetaMask the software is secure. But security depends on YOU:
- If you secure seed phrase properly = safe
- If you click phishing links = not safe
- If you share seed phrase = not safe
MetaMask can’t protect you from your own mistakes.
Q: Can MetaMask be hacked?
A: The MetaMask software itself has never been hacked. But users get “hacked” (phished) constantly by:
- Entering seed phrase on fake sites
- Approving malicious contracts
- Downloading fake MetaMask versions
- Using compromised devices
These are user errors, not MetaMask vulnerabilities.
Q: What’s the difference between MetaMask and Coinbase Wallet?
| Feature | MetaMask | Coinbase Wallet |
|---|---|---|
| Company | ConsenSys | Coinbase |
| Custody | Self-custody | Self-custody |
| dApp Support | Excellent | Good |
| NFT Display | Basic | Better |
| Market Share | Larger | Smaller |
Both are good. MetaMask is more popular for DeFi. Coinbase Wallet integrates well with Coinbase exchange.
Q: Do I need ETH in my wallet even if I’m only trading other tokens?
A: Yes. ALL transactions on Ethereum require ETH for gas, even if you’re swapping USDC for DAI. Keep at least $20-50 ETH in wallet for gas.
Your MetaMask Checklist
Before using your MetaMask wallet for anything serious, verify:
Security Checklist:
- Downloaded from official source only
- Seed phrase written down (NOT digital)
- Seed phrase stored in 2 separate physical locations
- Tested seed phrase recovery (it works)
- Strong unique password set
- Auto-lock enabled (1-5 min)
- Bookmarked real MetaMask website
- Bookmarked all DeFi sites I’ll use
- No cloud backup enabled (mobile)
- Understand never to share seed phrase
Usage Checklist:
- Know how to verify URLs
- Know how to read transaction details
- Understand token approvals (avoid unlimited)
- Have revoke.cash bookmarked
- Tested with small amount first ($50-100)
- Keep limited funds in hot wallet (most in hardware wallet)
- Know what to do if wallet compromised
Inheritance Planning:
- At least one trusted person knows wallet exists
- Seed phrase location documented (not the phrase itself)
- Inheritance plan in place
If you can check all these boxes, you’re using MetaMask more safely than 90% of users.
Remember: Your crypto security is entirely your responsibility. MetaMask gives you the tools, but you must use them correctly.
Start small. Learn the system. Make mistakes with $50, not $5,000.
Welcome to self-custody. You’re now your own bank.
Important Disclaimers
Technical Disclaimer
This guide is for educational purposes only. Cryptocurrency wallets and DeFi protocols carry substantial risk:
- Irreversible transactions (send to wrong address = permanent loss)
- No customer support for self-custody wallets
- Smart contract risks and exploits
- Phishing and social engineering attacks
- Device compromise and malware
You assume all risks when using MetaMask. Always start with small amounts and increase gradually as you gain experience.
Affiliate Disclosure
This article contains affiliate links to cryptocurrency exchanges where you can purchase ETH to fund your MetaMask wallet. We may earn a commission at no additional cost to you.
We only recommend exchanges we personally use and trust.
Read our full disclosure policy
Security Warning
Security best practices evolve. New attack vectors emerge regularly. Stay informed through:
- Official MetaMask blog and Twitter
- Crypto security researchers
- DeFi community discussions